Author: Jim Drewniak
The TSSG DevOps group have decided to use JIRA within a Docker container. The reason is to learn more about the use of containers for development and using various software like JIRA. When this installation is complete the laptop will be configure to use the Oracle VM Virtualbox and Docker.
Prerequisites
A laptop that has at least an i7 with four processors. My laptop is an i5 and proved to be pretty slow. At least 8 GB of ram is needed. Half a terabyte of hard drive was ok. A solid state drive would have performed better. My operating system of Windows 10 was ok as well.
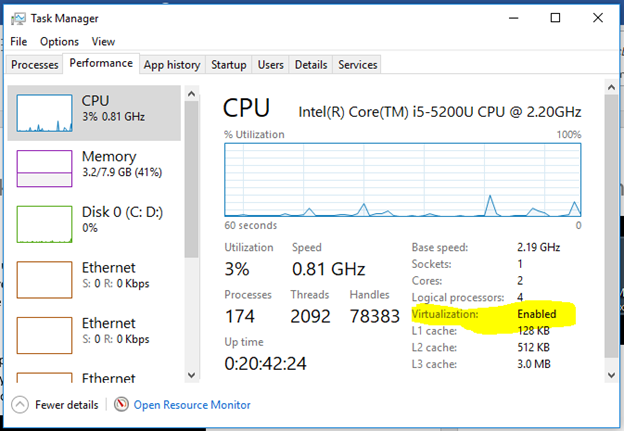
Virtualization must be enabled. If not the access the BIOS and set it to be Enabled. You can make this change during startup and pressing F10 repeatedly.

Virtualization must be enabled. If not the access the BIOS and set it to be Enabled. You can make this change during startup and pressing F10 repeatedly.
Obtain the Docker Toolbox
Go to this site using your browser: https://docs.docker.com/toolbox/overview/
Scroll down to this spot on the page and click on “Get Docker Toolbox for Windows”

This will download the executable file called “DockerToolbox.exe”
Install Oracle VM Virtualbox and Docker Quickstart Terminal
Once DockerToolbox.exe is launched it will install Oracle VM VirtualBox and Docker Quickstart Terminal. Your internet connection may be disrupted during the installation.

Configure Oracle VM Virtualbox
There are some settings that you should consider. Here are the settings we changed for my laptop.
Select settings and then system to change base memory to 2MB

Select Processor to use 2 CPU.

Confirm Docker is installed correctly
If it is not already running then launch the Docker Quickstart Terminal and enter the command “docker run hello-world”. You should see “Hello from Docker!”

We created a directory and sub-directory to put everything into. Use the commands: CD, MKDIR projects, CD projects, MKDIR jira, CD jira. It is not case sensitive.
The results is this;

Obtain JIRA install file
The file we used to install JIRA came from here: https://github.com/blacklabelops/jira
It is called: docker-compose.yml It will need to be modified before being used.
Obtain Notepad++
The best editor to use is Notepad++. If you don’t already have it you can get it here:
https://notepad-plus-plus.org/download
I chose the 64 bit version.
Change the docker-compose.yml file
All we need to change is the passwords.

The file was stored here: C:\users\JimDr\projects\jira\docker-compose.yml
Create the database and install JIRA
If not already running then launch the Docker Quickstart Terminal
** Thank you Ralph for supplying the remainder of the instructions **
Make sure you are in the same directory (\projects\jira\) as the "docker-compose.yml" file.
Enter the following command;
docker-compose -d up
You'll end up with the database image and container built first, and then the JIRA image and container built and configured automatically!
Author: Jim Drewniak
3 Comments
Ralph A. Navarro Jr.
Who wrote this article? Oh, there it is on the bottom of the page. How about placing an additional line under the heading: "by Jim Drewniak".
Also, a Table of Contents would be nice since you have many sections and sub-sections. See the "+" menu for adding an automatic Table of Contents. TOC works by creating a section of links to each of the heading style types. Make sure the Style type is a paragraph for the TOC itself, otherwise you'll get a blank TOC entry.
Anonymous
Ralph,
Thank you for your comments. I had planned on making these changes after all of the content was added. The document still has some remaining steps that I need help with. We can leave additional comments about formatting till the end.
Thanks again,
Jim
Ralph A. Navarro Jr.
Under: Create the database and install JIRA
Once you have the docker-compose.yml (and edited the passwords as directed), creating the database and installing JIRA is easy. Simply run this command in the directory that contains the docker-compose.yml file!
You'll end up with the database image and container built first, and then the JIRA image and container built and configured automagically!